Leighton Buzzard Tile Cleaning

Leighton Buzzard Tile Cleaning

Welcome to my Work History archive where you will find examples of the cleaning and renovation of tiles carried out in Leighton Buzzard.

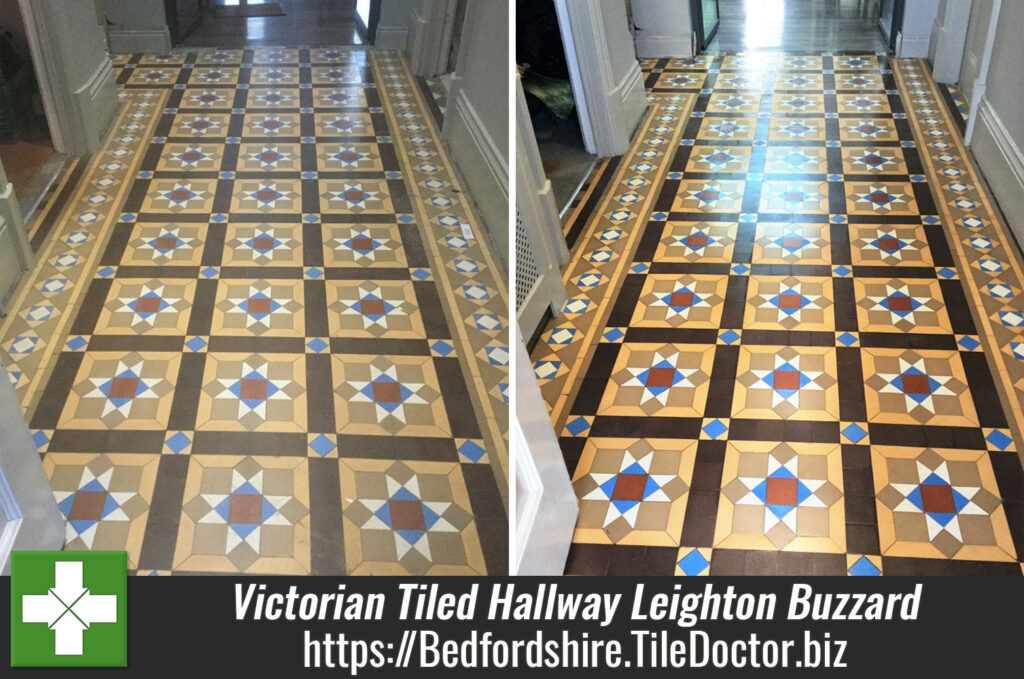
Victorian Tiled Hallway Deep Cleaned in Leighton Buzzard

Victorian Tiled Hallway Deep Cleaned in Leighton Buzzard

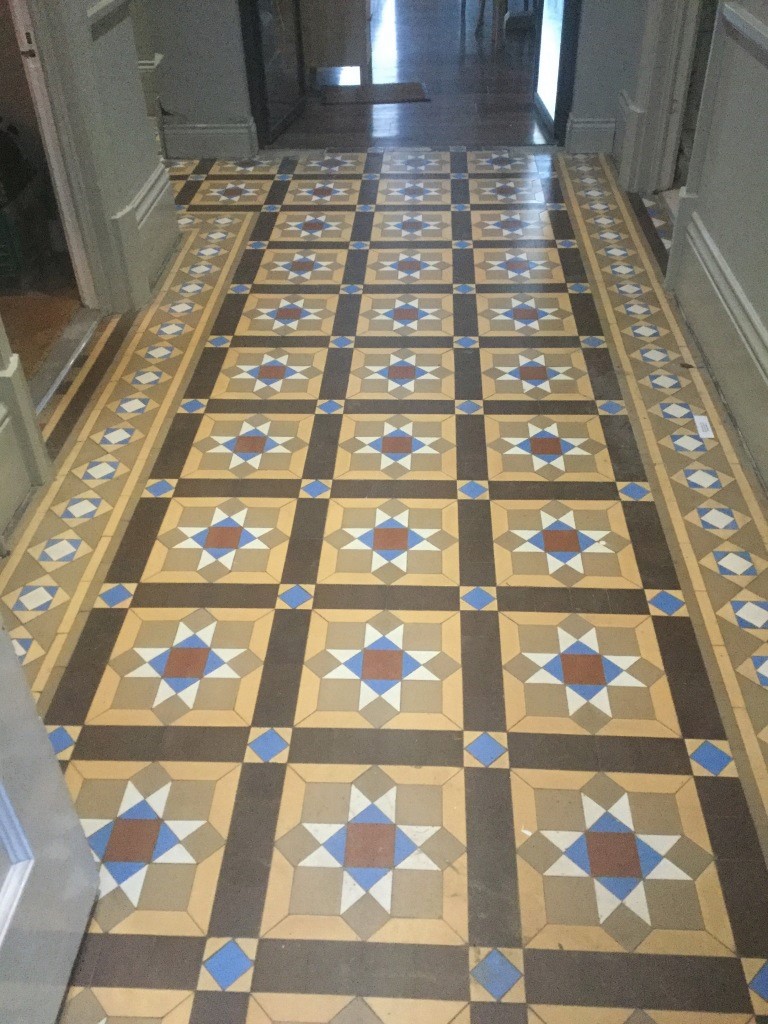
A homeowner in the Leighton Buzzard was having some renovation work done to their property and during the course of the work discovered an original Victorian tiled floor underneath the hallway carpet. The town dates all the way back to the 12th century so period features like this are quite common.

Keen to have the floor restored the owner got in touch to ask if I could survey the floor and quote for restoring it, so my colleague Phillip popped round to see what needed to be done. Surprisingly the tiles were generally in quite good condition for their age with just a few cracks and chips here and there. There were some missing tiles that needed replacing but I was able to help them source replacements which were fitted before the cleaning work commenced.
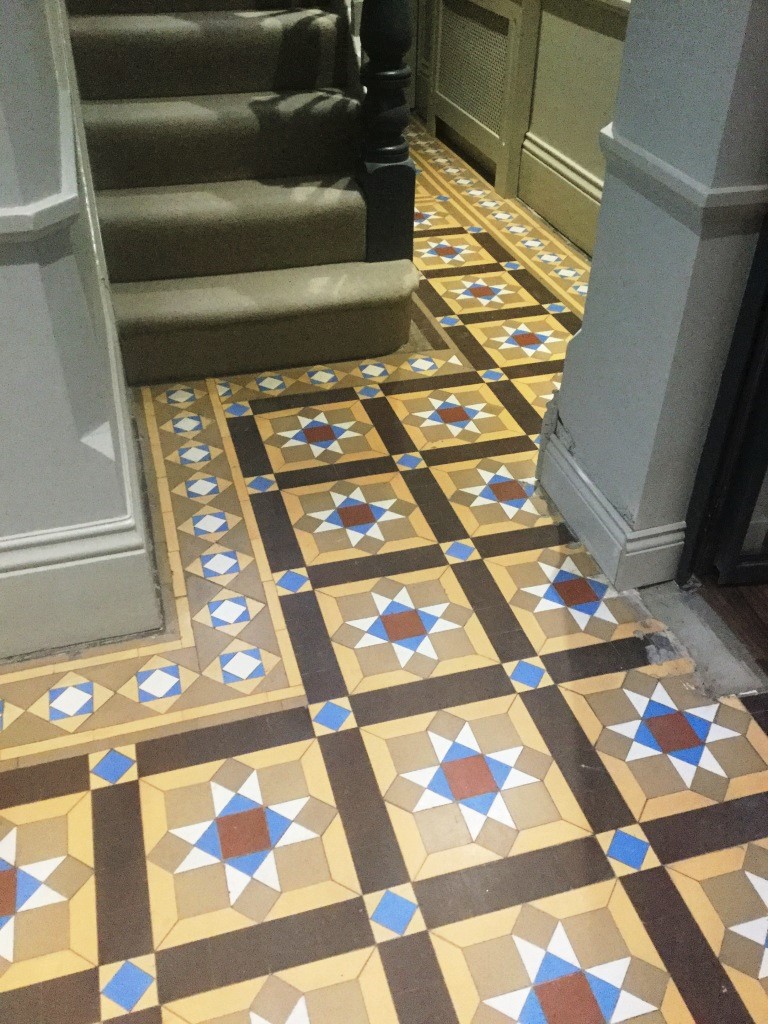
Victorian Tiled Floor Leighton Buzzard Before Cleaning Victorian Tiled Floor Leighton Buzzard Before Cleaning

Cleaning an Original Victorian Tiled Floor

I started the cleaning process by giving the tiles a deep machine clean with Pro-Clean which is a strong tile and grout cleaning product produced by Tile Doctor. A strong dilution was left to soak into the tiles before scrubbed in with a tile brush fitted to a rotary machine. This action lifted the surface soil and bits of plaster and paint which was then rinsed off and extracted using a wet vacuum.

With the soil and cleaning solution removed I then carried out a full inspection of the tiles in their natural state to see what other work would be required. As there was no apparent sealer present, I decided that the next step in the cleaning process would be to use a coarse 200 grit burnishing pad to clean and resurface the tiles, this was followed by a second rinse and wet vacuum. I then went around on hands and knees using Tile Doctor 100 grit diamond hand blocks to remove stubborn staining around the edges close to the newly painted skirting boards.

Sealing an Original Victorian Tiled Floor

The floor was allowed to fully dry for 2 days before I returned to apply Tile Doctor Colour Grow sealant which is an impregnating sealer that improves colour and is fully breathable, so it allows any damp from the sub floor to dissipate. Choosing a breathable sealer is important for these old floors which have no damp proof course and Colour Grow is normally my sealer of choice for Victorian floor tiles.

However Colour Grow dries to a matt finish and on this occasion the customer felt the finish still looked quite dull, although she was very happy with the results of the cleaning she asked if there was anything else I could do to brighten the finish, it was agreed that I would return a week later to carry out a damp test and if the results of this were favourable I would go ahead and apply several coats and apply Tile Doctor Seal & Go topical sealant which is water based and dries to a silk finish.

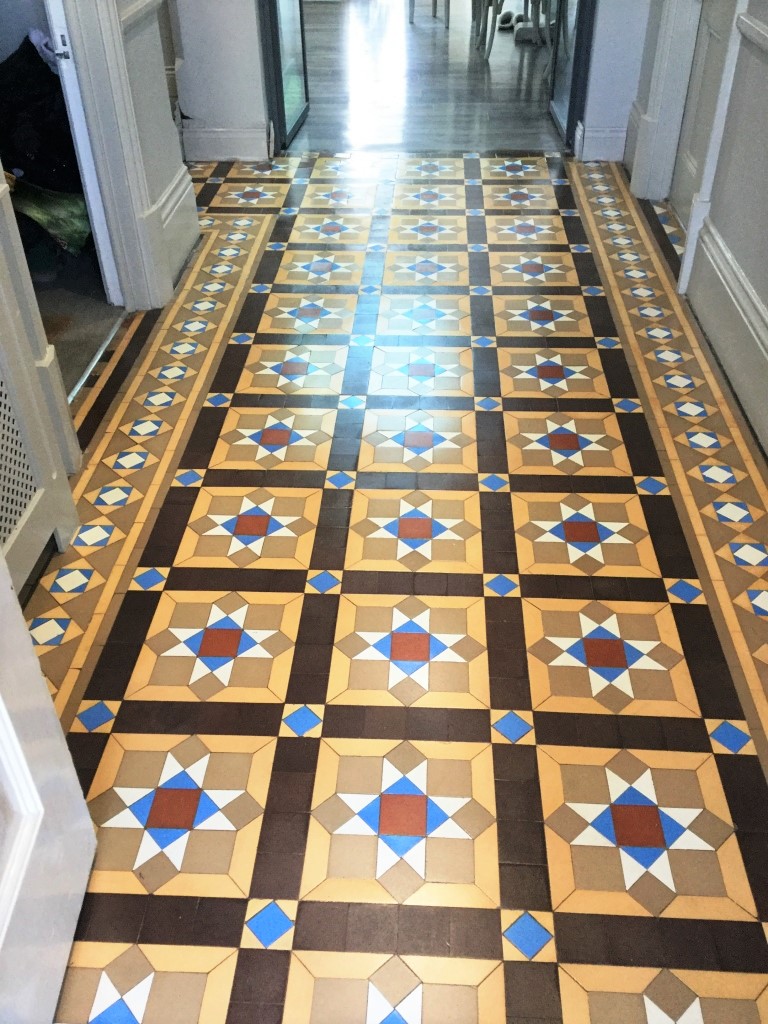
When I returned moisture, readings were taken which were acceptable, so as agreed I applied several coats of Seal and Go to give the tiles the desired appearance. With the work completed the customer was happy with the final results and even left the following feedback via the Tile Doctor feedback system.

Phillip arrived on time, worked very hard to prepare the floor- about 6 hours. Returned after floor was properly dry- 2 days. Applied a mat finish – 2-3 coats. I was disappointed with this finish, the floor which looked very flat and washed out. Each floor has its own characteristic and absorbs the products used differently. Phillip didn’t disagree, so applied two coats of a glossy finish which has brought out the beautiful colours of my Victorian floor. All of this was done without a quibble. Happy with the finish now. My advice is to discuss fully the finish you require and get a patch test done before so everyone is clear about the job in hand. Would use again. Ms. A Binger , Leighton Buzzard
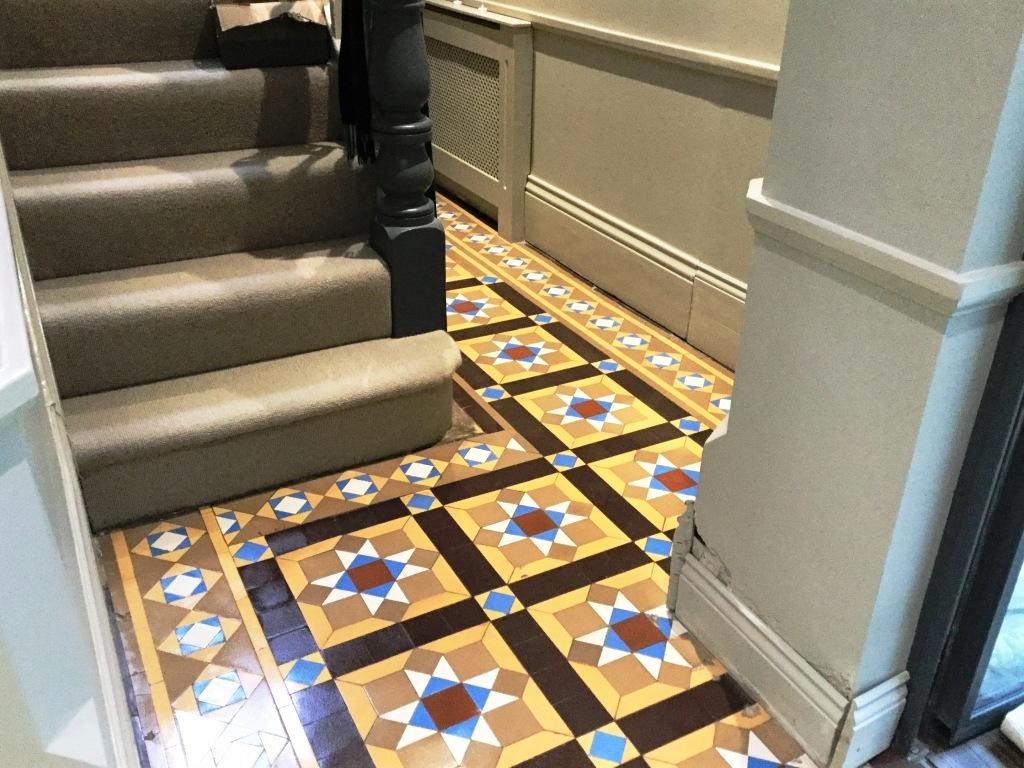
Victorian Tiled Floor Leighton Buzzard After Cleaning Victorian Tiled Floor Leighton Buzzard After Cleaning


Professional Restoration of Victorian Tiled Hallway in Bedfordshire

Victorian Tiled Hallway Deep Cleaned in Leighton Buzzard Read More »

Victorian Tile Before After Cleaning and sealing Leighton Buzzard

Leighton Buzzard Victorian Hall Tile Clean and Restore

We were asked to restore a beautiful geometric Victorian tiled floor. The property had been used as a letting house and the floor had been used and abused for many years, just given an occasional mop over from time to time.

Victorian Tile Before Cleaning Leighton Buzzard Victorian Tile Before Cleaning Leighton Buzzard

The new owners wanted to revive the colours and deal with the neglect. Step one was to put down the tile doctor pro clean alkaline cleaning solution and to let it dwell for a period of around twenty minutes.

We gave the solution plenty of dwell time before setting up our low speed rotary machine, underneath it we used a black pad to agitate and help loosen the ingrained dirt.

Once completed we set up our powerful rinsing tool which is attached to a machine fixed into our van, by doing this we do not need to dispose of any dirty water on your property but instead we take it away with us and dispose of it in the proper manner in an appropriate disposal point.

After rinsing the floor came up very well but we still felt it could be better, we used a steamer coupled with HBU Nanotech and a scraper to remove various deposits of paint and other sticky residue which had set over time.

After thoroughly rinsing the floor again we left the floor to dry for 4 days, Victorian tiles along with other earth based tiles are very absorbent and need to dry thoroughly and fully.

Victorian Tile After Cleaning and sealing Leighton Buzzard Victorian Tile After Cleaning and sealing Leighton Buzzard

On our return we tested for damp ensuring the floor was dry enough to seal.

To seal the floor we used two coats of colour grow impregnating sealer, once the sealer had dried we then began sealing the floor using seal and go.

After applying several thin coats of seal and go, the floor reached the desired appearance.

A combination of Pro clean, hbu nanotech, colour grow and seal and go with a little bit of care from your local tile doctor restored this old uncared for floor back to the prime of its life.

Refreshing a Victorian Tiled Hallway in Leighton Buzzard

Leighton Buzzard Victorian Hall Tile Clean and Restore Read More »

Terracotta Tiles in Wing Before After Cleaning

Deep Cleaning and Sealing and old Terracotta floor in Wing

We were asked to restore the Terracotta tiled floor at an old cottage in the village of Wing which was way overdue for a good deep clean and re-seal. In fact the tiles were so dirty they were black in some areas, which you can see for yourself in the photograph below.

Terracotta Tiles in Wing Before Cleaning

Cleaning Terracotta Floor Tiles

Fortunately this sort of work is bread and butter to a Tile Doctor and the process is relatively straight forward. The first job was to apply a reasonably strong dilution of Tile Doctor Pro-Clean which is an industrial strength alkaline Tile Cleaning product that is safe to use on Tile, Stone and Grout. This was left to dwell on the tile for a while and then scrubbed into using a rotary machine fitted with a black scrubbing pad, a stiff hand brush was used on the grout where the scrubbing pad struggled to reach.

The next step was to wash the floor using a Rotovac machine which applies water at a high pressure and also removes it to a storage tank using it’s built in vacuum. This finishes off the cleaning process and also washes the floor down with clean water to remove any remaining cleaning solution and neutralise the tile to remove any trace of cleaning chemical before sealing.

Terracotta Tile Sealing

The floor was left to dry overnight and when we returned the next day when the floor was completely dry to seal using seven coats of Tile Doctor Seal and Go which works well on Terracotta providing on-going stain protection as well as adding a nice shine to the tile. As you can see the floor cleaned up really well and now looks like a Terracotta floor should.

Terracotta Tiles in Wing After Cleaning
 

Terracotta Floor Cleaning in Wing

Deep Cleaning and Sealing and old Terracotta floor in Wing Read More »

Cleaning Quarry Tiles at Hockliffe Takeaway After

Takeaway Kitchen Quarry Tiles Cleaned Near Hockliffe

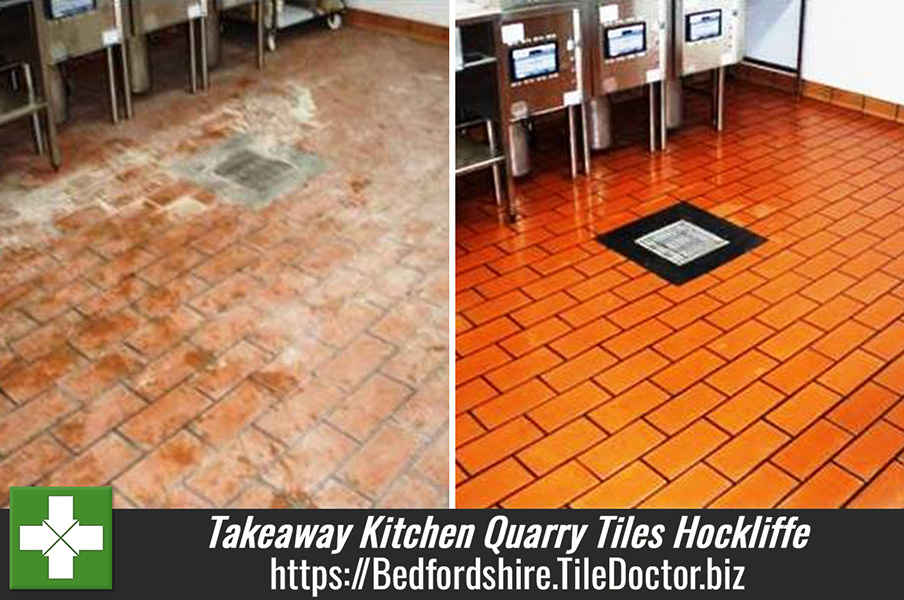
The Quarry tiles shown below were installed in the kitchen of a take away restaurant near Hockliffe, as you can see they were quite tarnished and not looking their best due to general wear and tear and the use of strong cleaning products; an inspection was also due and the proprietor was concerned it would be an issue.

Cleaning Quarry Tiles at Hockliffe Takeaway Before

Cleaning Quarry Tiles

To clean the floor tile and grout I decided to apply a strong combination of Tile Doctor Pro-Clean mixed 50/50 with NanoTech Ultra Clean and then diluted with water. This combination creates a powerful cleaning product containing nano sized abrasive particles that can penetrate deep into the dirt. The cleaning solution was left to dwell on the surface of the tile for twenty minutes before scrubbing with a rotary machine fitted with a black scrubbing pad and then washed off with a Rotovac machine which applies and removes hot water at high pressure effectively cleaning the tile and grout and rinsing then removing the water at the same time.

Cleaning Quarry Tiles at Hockliffe Takeaway After

Sealing Quarry Tiles

Once we were happy with the Quarry tile and grout was clean we left the floor to dry assisted with air blowers to speed up the process. It wasn’t long before it had dried and we were then able to the Tile and Grout using Tile Doctor High Shine sealer which should protect the floor for at least three years given the high traffic, this is of course as long as they use the correct cleaning products as acidic products will reduce the life of a sealer. The kitchen was now ready for inspection where it should pass with flying colours.

Quarry Tiled Take Away Kitchen Floor Cleaned and Sealed in Hockliffe.

Takeaway Kitchen Quarry Tiles Cleaned Near Hockliffe Read More »

Ceramic Tiled Shower Before and After Leighton Buzzard

Ceramic Tiled Bathroom Cleaned and Sealed in Leighton Buzzard

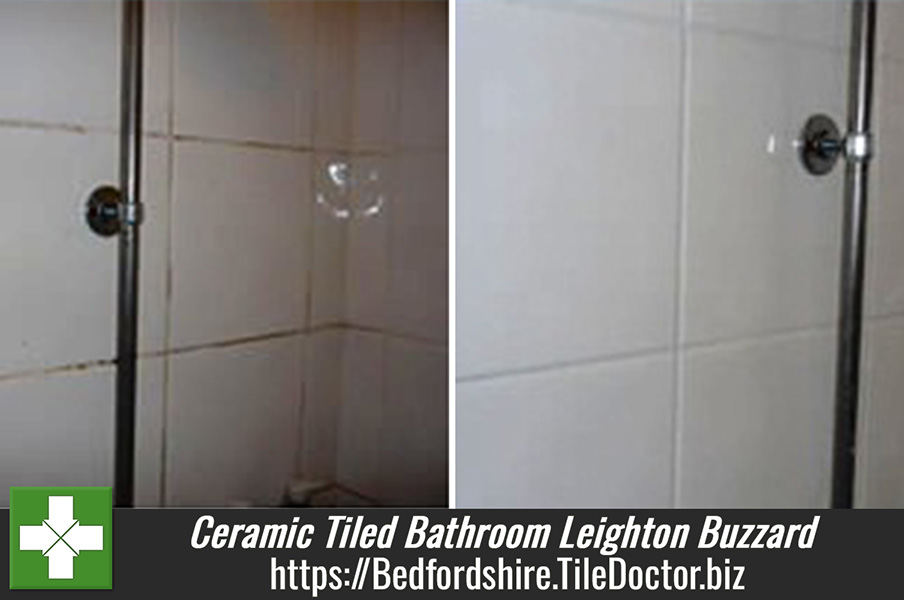
This Ceramic tiled family bathroom with shower was installed at house in Leighton Buzzard and was in need of rejuvenation. You can see from the photograph below that the tiles were in reasonable condition but the grout had become ingrained with dirt which is not unknown as the top layer of grout is porous and will discolour over time if not protected.

Cleaning Ceramic Tile and Grout

The Ceramic tiles and grout were treated using a strong 2:1 dilution of Tile Doctor Pro-Clean mixed 50/50 with Nanotech Ultraclean which combines a highly powerful Tile and Grout cleaning product with tiny abrasive particles. For vertical tiled surfaces I recommend the mixture is decanted into a bottle with a trigger spray attachment which when sprayed onto the wall allows the cleaner to mix with air making it lighter and allowing it to stick better. The solution was then worked in using a stiff scrubbing brush by hand before being rinsed off with water; this process was repeated a number of times until we had managed to clean all the areas and then left to dry.

Ceramic-Tiled-Shower-Before-and-After-Leighton-Buzzard

Sealing Grout

The grout was dried and the sealed with a couple of coats of Tile Doctor Grout Sealer which forms a protective barrier over the porous grout and keeps it looking good for longer. Most sealers can be used on grout (check the label to confirm) but for best results use a spray bottle as mixing the sealer with air improves its ability to stick to a vertical surface.

Refreshing a Ceramic Tiled Bathroom in Leighton Buzzard

Ceramic Tiled Bathroom Cleaned and Sealed in Leighton Buzzard Read More »

Leighton Buzzard Terracotta Before and After

Terracotta Tiled Floor Cleaned and Sealed in Leighton Buzzard

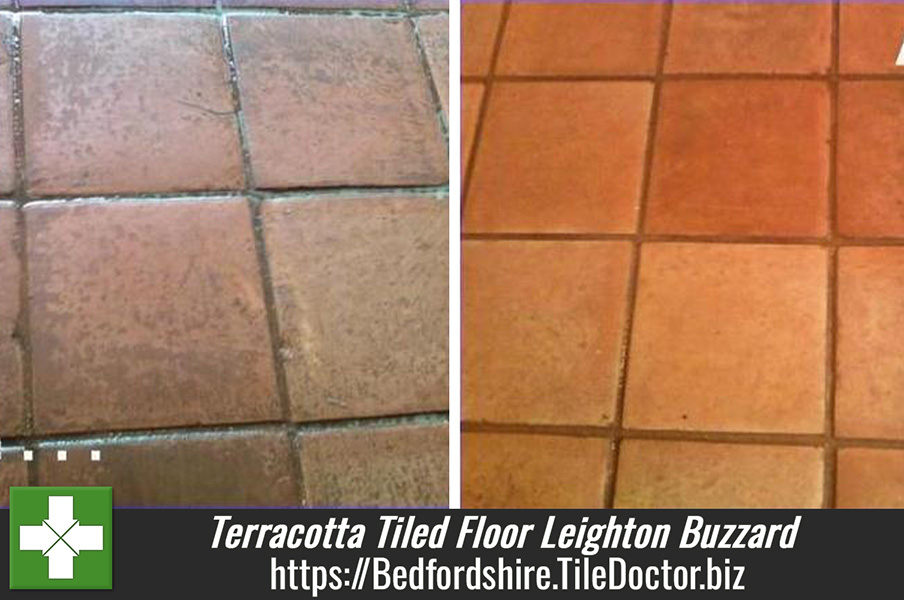
Details below of a Terracotta tiled floor at a house in Leighton Buzzard which was in need of a deep clean and re-seal.

Cleaning Terracotta Floor Tiles

To get the tiles clean we applied a strong dilution of Tile Doctor Pro-Clean mixed 50/50 with NanoTech Ultra Clean which combines into a heavy duty alkaline cleaner containing nano sized abrasive particles that cleans deep into the tile. For best results let the cleaning solution dwell on the surface of the tile for 10-20 minutes before working it into the tiles with a rotary machine fitted with a black scrubbing pad. The soiled solution was then removed from the floor using a wet and dry vacuum and the stubborn areas treated with a steamer, following that the whole floor was washed down to remove any remaining chemical before sealing.

Leighton Buzzard Terracotta Before and After

Terracotta Tile Sealing

We returned when the floor was dry to seal using seven coats of Tile Doctor Seal and Go (Terracotta is very porous) which works well on Terracotta adding a nice shine to the tile as well as providing on-going stain protection.

Terracotta Floor Maintained in Leighton Buzzard

Terracotta Tiled Floor Cleaned and Sealed in Leighton Buzzard Read More »

=================================

Bedfordshire Tile Doctor

================================= Read More »

Scroll to Top