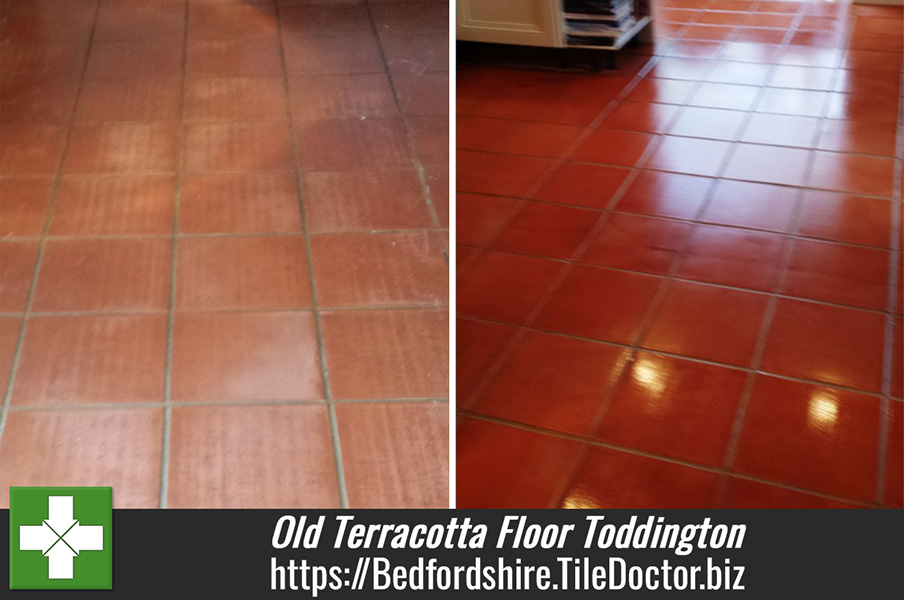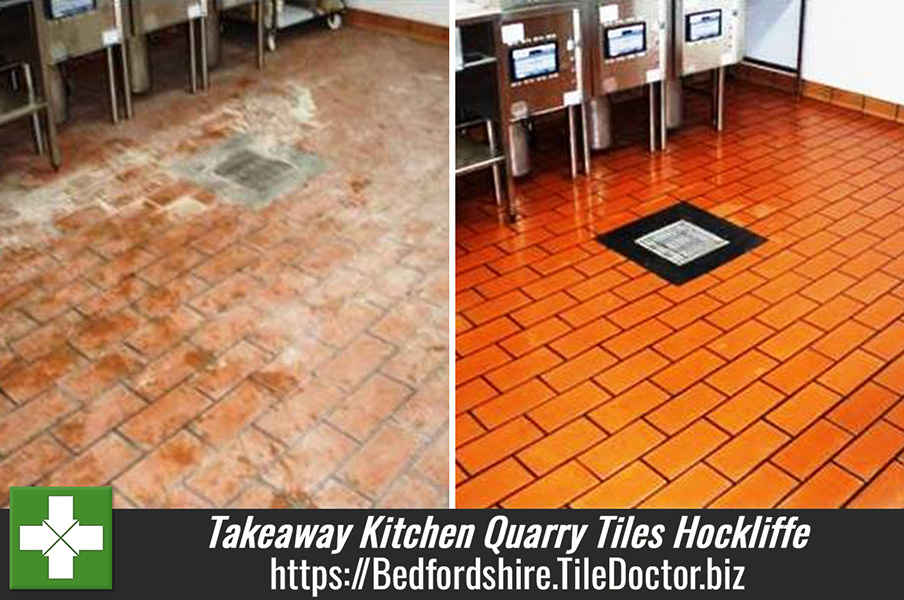
Efflorescence-Stained Quarry Tiled Floor Restored at a Listed Building in Elstow
I was contacted by a homeowner in Elstow who after seeing a similar Quarry tiled kitchen floor on my website was keen for me to restore theirs. The property was Victorian and formed part of a listed building in a prominent Bedfordshire estate.
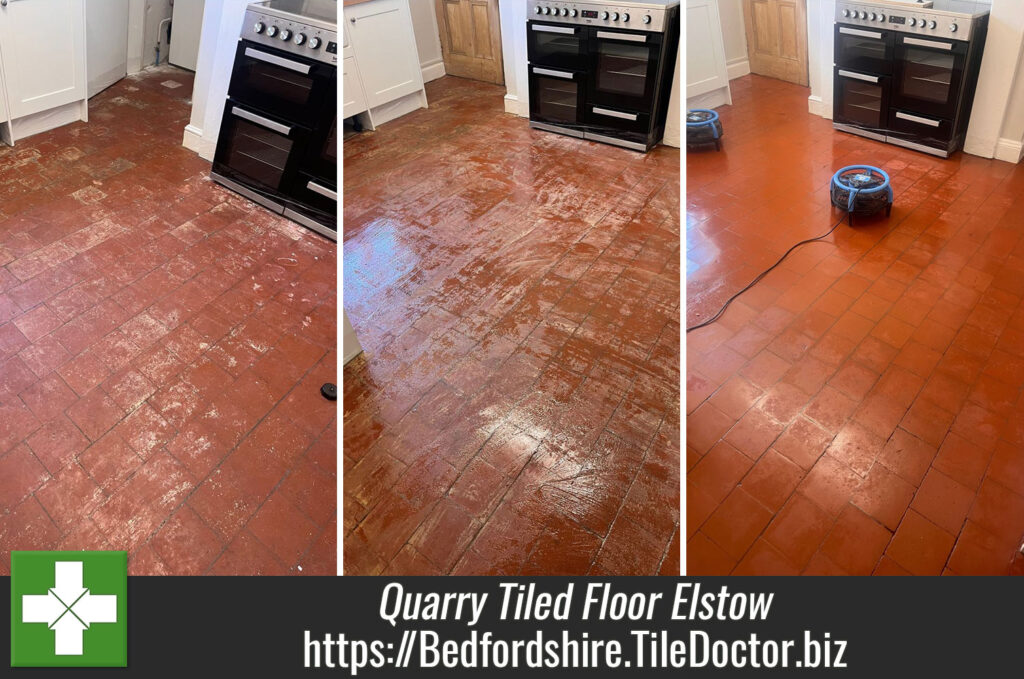
I paid a visit to the property to survey the old Quarry tiles and work out a plan for its restoration. The floor had obviously been covered in Vinyl at some stage as there was a residue of resin glue all over it as well as signs of efflorescence.

Old properties don’t have a damp proof membrane installed under the floor so putting a waterproof barrier such as Vinyl over the floor is not a good idea. These old floors were designed to breathe and allow any moisture building up under the floor to evaporate, preventing that can result in damp reaching out to the walls. In this case it had resulted in efflorescence as White salts were deposited on the surface of the Quarry tile as the floor dried out.

I worked out a quote to deep clean the floor, remove the efflorescence and then seal it to protect it going forward. This is turn was then presented to the Local Planning Authority who had insisted on reviewing and approving all the products and methods being used to restore the floor due to it being a listed building.
After going through the hoops with the planning department and providing lots of information the project was finally approved and I was given the go ahead.
Cleaning and Removing Efflorescence from Victorian Quarry Tiles
To remove the remnants of glue the floor was sprayed with a strong dilution of Tile Doctor Remove and Go which is a strong alkaline coatings remover. This was left to soak into the tile and breakdown the adhesive for around fifteen minutes. Then the floor was scrubbed with an abrasive Black pad fitted to a heavy-duty rotary floor machine. This process released the old glue and dirt from the tiles turning the solution into a dark slurry. The soiling was then removed using a high-powered extraction machine that is fitted into our van.

The next step was to deal with the efflorescence staining by giving the floor an acid wash using Tile Doctor Acid Gel. The acidic formula literally dissolves the alkaline salts allowing them to be rinsed off the floor and extracted as before, it also neutralises the pH level of the tiles following the use of Remove and Go earlier. Also being a gel product less water is used in the process allowing for a quicker drying time.

The floor was then left to dry out overnight with the assistance of a couple of floor fans.
Sealing Victorian Kitchen Quarry Tiles
I returned the next day to apply a sealer that will enhance the appearance of the floor and protect it. First however I wanted to be certain the floor was dry as applying sealer to a damp floor can result in patchiness. To do this I took several moisture readings with a damp meter.
As I mentioned earlier, old floors like this one need to allow moisture to pass through the tile and evaporate at the surface, as I result you need to use a fully breathable sealer that will allow for that. In this case we chose to use Tile Doctor Colour Grow which is fully breathable and contains a colour enhancer that brought out the orange and red colours in the Quarry tiles.

Last step was to run a 3000-grit polishing pad over the floor to even out the sealer application and provide a balance look which exceeded everyone’s expectations. Finally, I took time to discuss maintenance cleaning which for a sealed floor like this I recommended Tile Doctor Neutral Tile Cleaner which is a gentle but effective floor cleaner.
Professional Restoration of a Victorian Quarry Tiled Floor in Bedfordshire
Efflorescence-Stained Quarry Tiled Floor Restored at a Listed Building in Elstow Read More »